In this tutorial, I will show you the steps I took to Create a Grungy Style Text Effect Inspired by “Infamous 2” Game in Photoshop. This is a beginner level tutorial and steps are quite easy to follow, have a try!
The primary focus on this tutorial is the application of flow/opacity for both the Brush and Eraser tool, as well as the use of clipping mask to create the urban city overlay effect for the text. I have also included some steps about image adjustments and layer blending.
Here is a preview of the final effect: (click to enlarge)
Image may be NSFW.
Clik here to view.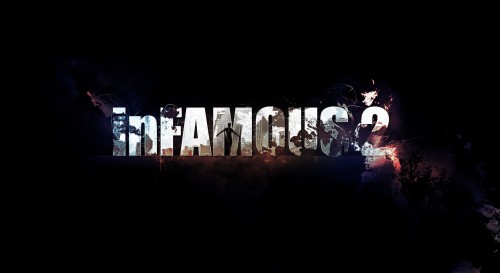
PSD File Download
You can download the PSD File for this tutorial via the VIP Members Area for only $6.95/Month (or less)! You will not only get this PSD File, but also 70+ other PSD Files + Extra Goodies + Exclusive Photoshop tutorials there. Signup now and get exclusive :) Find out more about the VIP Members Areas
Image may be NSFW.
Clik here to view.
Ok Let’s get started!
To complete this tutorial, you will need the following stock: (registration required for those images)
Step 1
Create a new document sized 1280px * 700px with black background. Use a bold font (I used the “Impact” font here) and type some text onto the centre the canvas:
Image may be NSFW.
Clik here to view.
Create a new layer on top of the text layer, use a soft white brush to do a single click on the edge of the canvas as shown below:
Image may be NSFW.
Clik here to view.
Compress this layer down as shown below:
Image may be NSFW.
Clik here to view.
Reduce the opacity of the layer to around 30%, and you will now have the following effect under the text:
Image may be NSFW.
Clik here to view.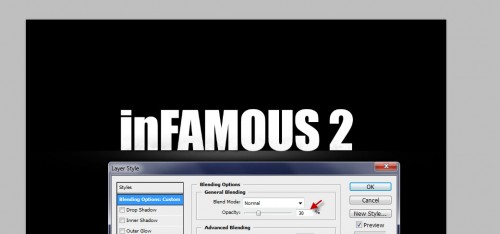
Use the grunge brush you download, paint some grunge patterns around the text:
Image may be NSFW.
Clik here to view.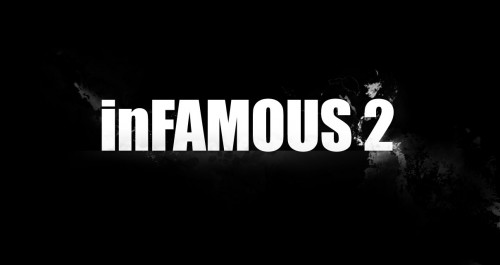
As you paint, use a soft eraser tool to remove parts of the pattern to create fade-in effect: (set eraser flow and opacity to around 50%)
Image may be NSFW.
Clik here to view.
Step 2
Add a layer mask onto the text layer, then grab the Eraser tool with one of the grunge brush selected, erase parts of the text as shown below:
Image may be NSFW.
Clik here to view.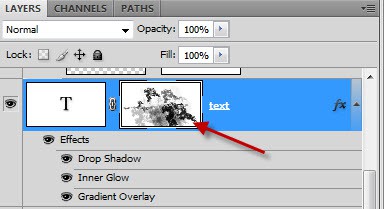
Make sure you adjust the flow and opacity of the eraser for some texture variety, and it will later reflect on the text:
Image may be NSFW.
Clik here to view.
As you can see, I use 100%, 50%, and 30% flow and opacity for different areas of the text:
Image may be NSFW.
Clik here to view.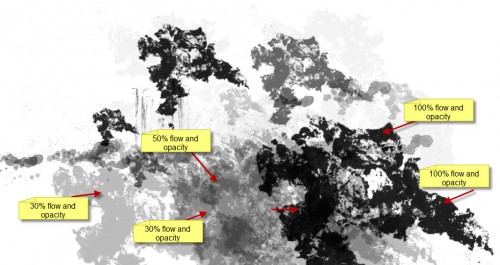
and here is the effect after applying the layer mask on the text:
Image may be NSFW.
Clik here to view.
Step 3
Load the city stock image into Photoshop, select a portion of the image with quick selection tool as shown below:
Image may be NSFW.
Clik here to view.
Copy and paste the selection onto our document, re-size and position it as shown below:
Image may be NSFW.
Clik here to view.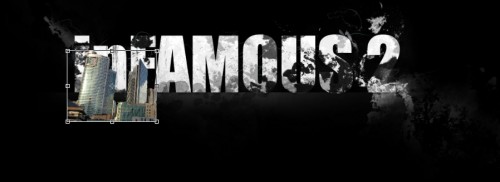
Go back to the city image and select a different portion, and paste it onto our document. Repeat this process until you have a variety of the buildings covering the text as shown below:
Image may be NSFW.
Clik here to view.
Merge all those building layers into one layer, right-click on the layer and choose “Create clipping mask” (or press Ctrl + Alt + G):
Image may be NSFW.
Clik here to view.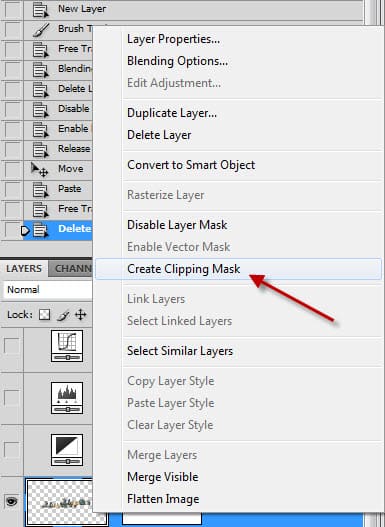
Reduce the layer opacity of this city layer to around 85%, and you will have the following effect:
Image may be NSFW.
Clik here to view.
Apply the following black and white adjustments to this city building layer:
Image may be NSFW.
Clik here to view.
and here is the effect so far:
Image may be NSFW.
Clik here to view.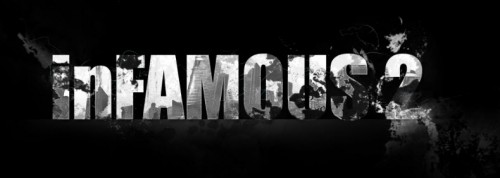
Step 4
Load the Model image into Photoshop, cut out the model and paste it onto our document, re-size and position it as shown below:
Image may be NSFW.
Clik here to view.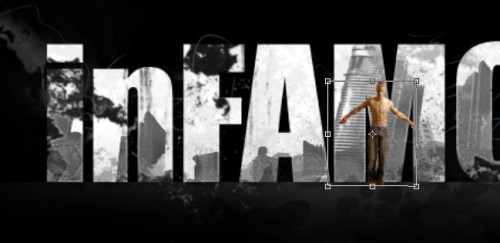
Load the selection of this model layer and fill it with black colour:
Image may be NSFW.
Clik here to view.
Reduce the layer opacity of this model layer to around 80%, you will have the following effect:
Image may be NSFW.
Clik here to view.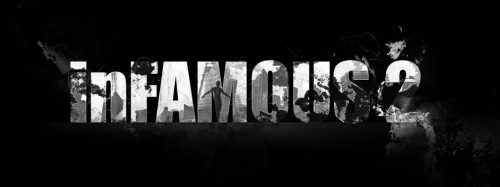
Step 5
OK we’re almost done! For some final fine-tunings, I added some blue/red colour onto the text by creating a new layer on top of all previous layer, set its blending mode to “Color Dodge”, and use a soft brush with relevant colour to paint over it:
Hint: Adjust the brush flow/opacity as you paint, and use the Eraser Tool to remove parts that you don’t have colour on.
Image may be NSFW.
Clik here to view.
I also added some random lines around the text with a bit of tablet pen drawing (1px hard brush):
Image may be NSFW.
Clik here to view.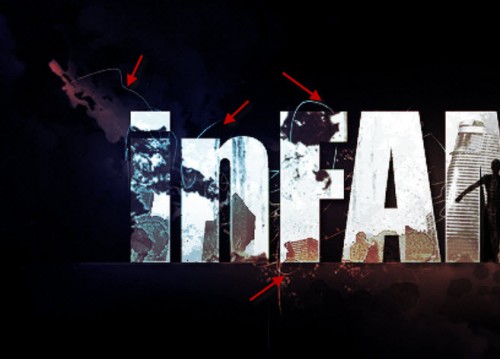
Image may be NSFW.
Clik here to view.
I also used a bit of the Sharpen Tool to sharpen some parts of the text, and here is the final effect I have for this tutorial: (click to large)
Image may be NSFW.
Clik here to view.
That’s it for this tutorial! Hope you enjoy it and find it useful! Till next time, have a great day!
The post Create a Grungy Style Text Effect Inspired by “Infamous 2” Game in Photoshop appeared first on Photoshop Tutorials, Digital Art Tutorials and Showcase - PSD Vault.